When it comes to the in-between seasons part of the year, it can be kind of awkward to figure out which colors to wear. As of now, the weather is slowly transitioning from summer to fall and although it's still warm, it's cooling off and looking and feeling a little bit more like fall. My solution to this awkward half-summer half-fall time is to cut out the super light pastels and wear darker colors that are still bright! A perfect one is actually from the drugstore!
You may have heard of Sally Hansen Pacific Blue before because it has been raved about for a while! This polish is a GORGEOUS and unique medium blue shade. What makes it different is it's bright almost neon quality. This polish is nearly guaranteed to be noticed and complimented by those who see it!
This polish has an awesome formula and a wide brush that makes application faster and easier. It applies completely opaque with two coats.
One more awesome thing about this polish? I picked it up at my local Walgreens for only $2.97! I was a little nervous that the quality wouldn't be there but I am completely impressed and am hoping to try more of these soon!
One more side note, if you were looking for a unique, bright, medium blue color, definitely try this one rather than Essie Butler Please. That one is terrible quality AND more expensive. Just a side note!
Anyways, I hope this post was helpful! Definitely check this color out.
So this weekend I ran out of my beloved Nars Radiant Creamy Concealer.. And because I don't live anywhere near a place that I can purchase Nars, I knew I had to pick up a concealer to get me by until I could get a new one. I couldn't use any of the concealers I already had because NONE of them were in my shade. So what does any makeup junkie do when they are in need of a quick fix? I started researching drugstore concealers!
I read quite a few reviews on the Revlon ColorStay concealer, good and bad. I wasn't too surprised about the mixed feelings on it because nearly every concealer I looked up had the same variety of reviews. I was choosing between this one and the Revlon PhotoReady concealer, and this one won because I was more comfortable with the liquid consistency rather than the stick formula of the PhotoReady.
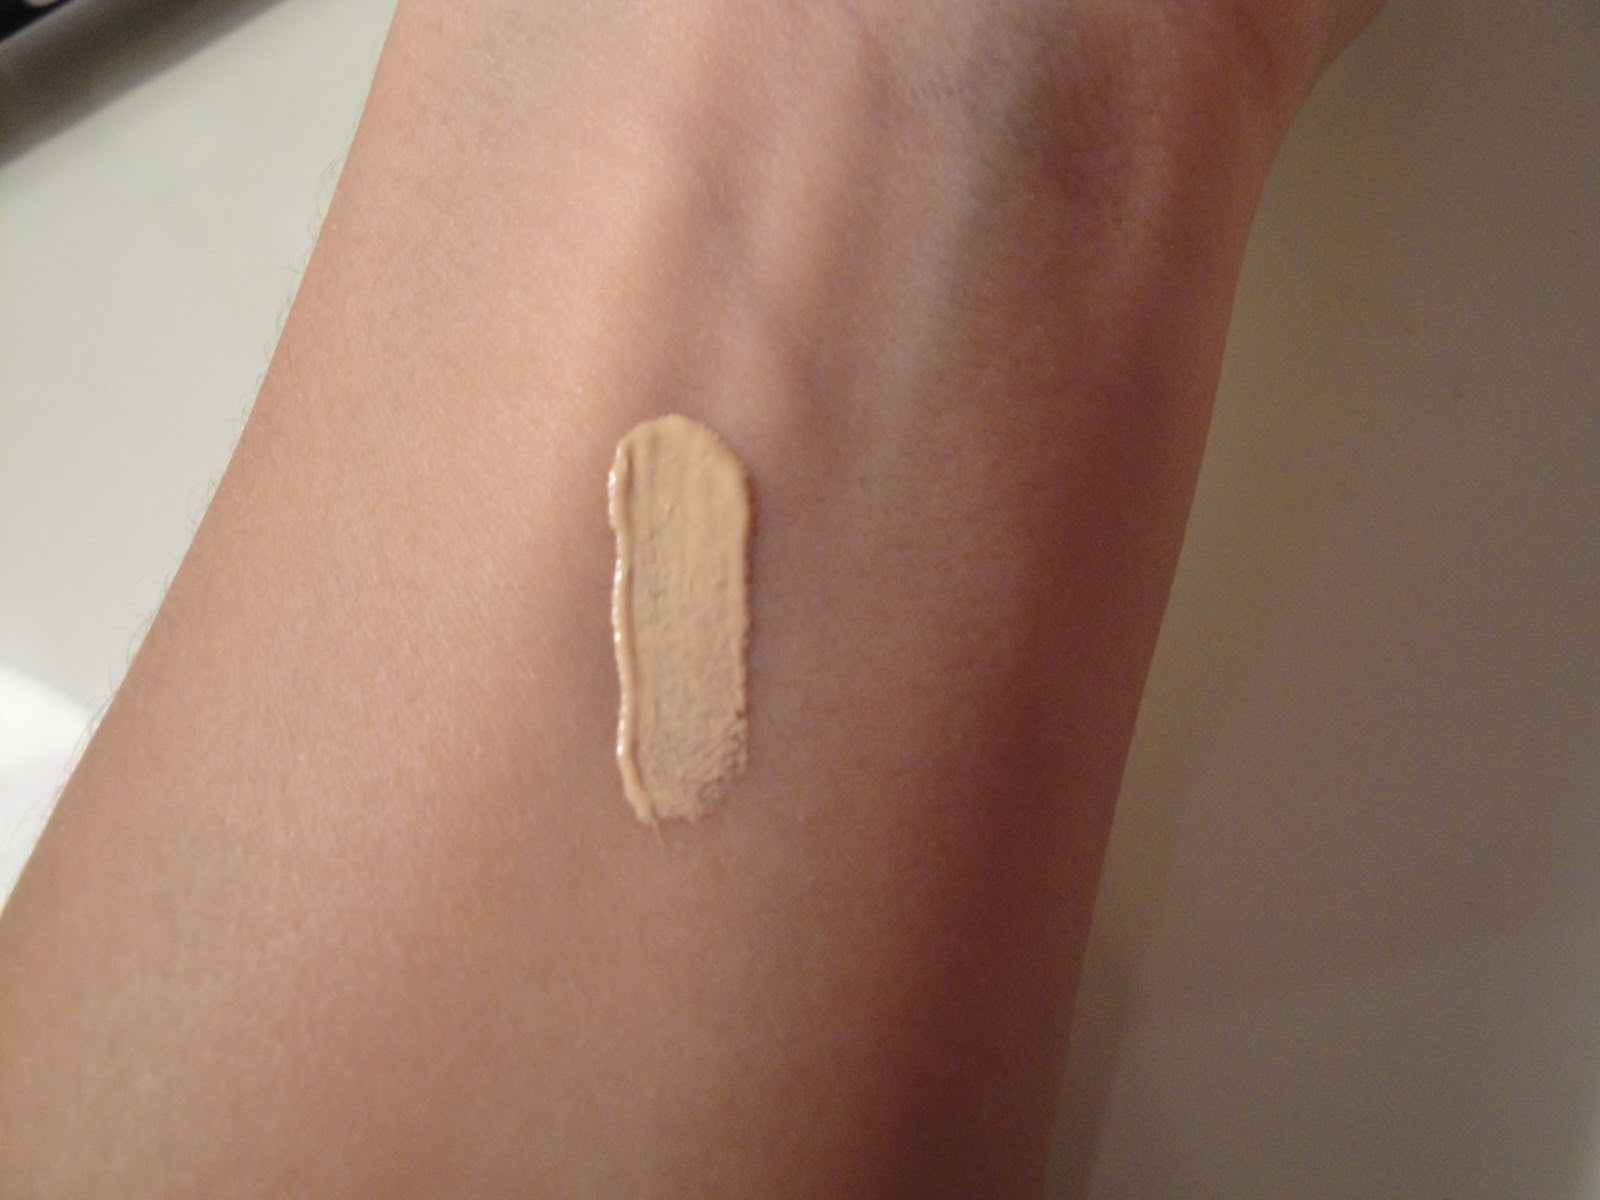
I picked up this concealer in the shade light, which was too light for me
I expected to like this concealer because it had a lot of things that I liked in it. First off, it was in the ColorStay line, and Revlon ColorStay is my favorite foundation. Also, it was a liquid concealer that came in a tube with a doe foot applicator, which is my favorite kind of concealer. So I thought, 'how bad can it be, right?'
WRONG! This concealer is TERRIBLE. At first, it seems like it is going to be awesome. When you start dotting it on, the concealer looks nice and opaque with a little bit of a thicker consistency. But once you start blending is when the real magic happens. As you blend, the concealer literally covers nothing. All it does is leave an odd layer over the skin that barely conceals anything. But while it has hardly any coverage, it still manages to look cakey and heavy. How that's possible? I HAVE NO IDEA!
I really tried to give this mascara a chance. I tried blending it in with my fingers and a brush and both gave the same effect (blending with my fingers actually made it look worse).
This product ended up being nearly $10 when I purchased it at WalMart. So it's fairly pricey for a drugstore product and it's terrible quality. I will definitely be trying to return this one tomorrow.
As you can see, I do not suggest this product. I honestly can't imagine it working for anyone. Unfortunately, this one is a miss :(
So after using the same mascara for months and months (Loreal 24 H Power Volume Collagen Mascara.. See a review here), I started itching to try a new one. Does anyone else get that way?
Anyway, my friend told me about Maybelline the Rocket and I had heard a lot about it, so I started looking at reviews to see what I could find. After finding reviews, and then finding it for only $5.94 at WalMart (YES, A MASCARA FOR $6!!!!) I had to try it!
I included two pictures of the wand without any mascara on it just so you could really see it. First things first, this wand is amazing! I have to be honest, I didn't think I would like it.. at all. I am usually not a fan of rubber wands, especially because the ever-so-famous Covergirl Lashblast Volume has a rubber wand and literally does NOTHING to my lashes. So from the beginning, I wasn't really expecting much.
But I was most definitely wrong! This wand is filled with fairly long rubber bristles. Because there are so many bristles, the wand catches each and every lash. The long bristles help to not only apply the product but to evenly sweep and comb it through the lashes. This wand is the best I have ever used, by far!
In this picture with the wand with mascara on it, you can see that there are no clumped spots on the wand.
The formula of this mascara is more on the wet side, but don't let that scare you away! It is not thick and messy, but more of a thin wet consistency. It is very easy to work with.
This mascara gives excellent volume from the first coat! It volumizes, separates, and adds a little length. It is very buildable, so with each new coat you get added volume and more drama! This mascara builds better than any I have ever tried.
And one of the best features? NO CLUMPS. EVER! I am not someone who is repulsed by a little bit of a clumpy look, but this one has blown my mind. The wand truly separates and makes clumping nearly impossible. Even with three coats, my lashes still looked defined. I always thought volumizing mascara with separation and definition was just impossible, but here it is!
Also, I have had no problem with this mascara smudging or flaking on me. For me, it wears all day just fine. The only complaint I have is that whenever I accidentally get it on my eyelid while applying it, it is very hard to get off. Most of the time, I can use the q-tip trick, but this one does not come off. So you may need to be a little careful.. but to me it is still worth it!
Lately, to get more length, I have been applying my mascara in a different technique. Before combing through my lashes with the wand, I apply the mascara first to the tips of my lashes. After I have applied some to the tips, I go ahead and comb through all of my lashes. I do this with the second and third coat as well (if I do a third coat). It still volumizes my lashes just as well, but with some added length. I got this idea from this video:
So that's it! I am so surprised that I fell in love with this mascara but it is definitely my new favorite. Give it a shot!
Thank you all so much for reading! I hope this was helpful!
Does anyone else have that one concealer or foundation that they always wear in the summertime? Well for me, it's the Mac Pro Longwear Concealer!
This concealer is probably one of my all time favorites and I'm so excited that I'm finally tan so that I can wear it again (more on that later on in the post)!
So for the basics, this concealer has great packaging.
The packaging is nice and compact and it comes with a pump (mine was very messy, but I still love liquid products with pumps)! The only problem with this pump is that it tends to dispense way too much product..
This picture is the least amount of product I could dispense (and it covered everything I needed covered). If you do a full pump, you will end up with so much product that a ton will end up wasted, so BE CAREFUL! This pump isn't one that is easy to control how much product comes out, but I suggest you very carefully try to pump as little product as possible. Also, for those wondering, it comes in a glass bottle.
Now on to the actual product.. This concealer is obviously a liquid consistency. I find that it's the perfect consistency for a liquid concealer-- not too liquidy, but liquidy enough.
It applies super easily and blends in to the skin and looks natural. I love the finish that this concealer has, it sets to a beautiful natural matte finish.
The coverage is medium to full and very buildable. One layer of this product will give you medium coverage but you can layer on more to give you a great full coverage.
One of my favorite things about this concealer is that it is VERY long wearing-- the name doesn't lie! It stays looking good for a very long time, and even when it starts to show wear, it wears beautifully. It stays matte for longer than any other concealers I have owned. When I was travelling about a week ago, I applied this at 5 A.M. and it stayed on until I took it off at about 11:30 P.M. The only sign of wear that it showed was that my skin was starting to get a little shiny. Pretty impressive!
Now I must admit, there is another downside to this product (at least for me). The reason that I can only wear this product in the summer is because of the color range. I am strictly in the NC shades in Mac. My summer shade is NC30 and the next shade down from that in the NC shades (for this concealer) is NC20. For those of you who have no idea what I'm talking about, it basically goes from my dark summer shade to a very light shade that is even too light for me during the winter time. There is no in between. I would love to use this concealer year round and have different shades but they virtually don't have my color! I do realize I could mix NC20 and NC30 but that is a bit of a hassle and I would waste a lot of product. Most of you may not encounter this problem, I just wanted to mention it just in case anyone else is around these shades.
Overall, I think this is a great concealer and I highly suggest checking it out, especially if you have a long day and need your makeup to last. It retails for $18 which I think is an amazing price especially considering how long one bottle will last you!
This concealer is available wherever Mac products are sold-- Mac stores, Mac counters in department stores, maccosmetics.com.
Thanks so much for reading! I hope this was helpful :)
One of my favorite holidays is July 4th! Not only do I love the cookouts, fireworks, and time with family and friends, but I love doing patriotic nails!
This year I decided to keep it pretty simple with a super easy, patriotic manicure.
The first step is to apply a base coat. You can apply whichever one works for you, I used the Nail Tek Intensive Therapy 2 (need to post a review on this)! Don't skip this step though because it is very important! It makes your nail polish apply better, last longer, it protects your nails, keeps your nails from staining, and even makes your polish easier to remove when its time to take it off.
I let this dry for about 5 minutes before applying the next polish.
Next, I applied a classic, deep red polish to all of my nails except my ring fingers. I used an opaque red so that I could get a pretty good looking even color in one coat. You can use whatever red polish you like, I used Personal Shopper from Sephora by OPI and it was kind of a hassle because after the first nail I realized that the polish I had was old. Still a beautiful color though!
I let this dry for 10 minutes before applying the next polish.
On my ring fingers, I applied a blue color, and again, you can use whichever blue you like. This one takes two coats but is one of my all time favorites. I used Blue My Mind by OPI.
This polish dried for 10 minutes between each coat and before the next polish was applied.
This next step is where you can really get creative. You can draw stripes on your nails, stars, use nail stickers, etc.
I applied a chunky silver glitter polish. I love this because it adds some sparkle to the look and the big silver glitter represents stars on our flag! I used the Essie luxeffects nail polish in Set in Stones.
This dried for 10 minutes before applying the top coat.
As always, I finished up with a top coat. I used the OPI RapiDry Top Coat.
I let my nails dry for about 20 minutes before doing other things. Nail polish can take a few hours to COMPLETELY harden.
And there you have it-- super easy, cute July 4th nails!
I'm definitely glad to be adding a little more lifestyle and fashion to the blog today!
I don't know about where you live, but where I live it gets HOT in the summer. Because of this, I usually choose loose fitting, comfy clothes to stay cool and comfortable. Lucky for me (and you too) I have found a super cute and comfortable tank top! It's the Salt Wash Tank in Lavender from the Southern Shirt Company!
Sorry about the lack of a better picture.. I'm on vacation and hoping to get a better one soon!
The front pocket area and the back of the shirt both have the same emblem that says "The Southern Shirt Company" and has their cotton logo!
If you can't tell already, I am obsessed with this tank! It is SUPER soft and comfortable while still feeling durable and well-made.
This shirt is a gorgeous light lavender. The color is so unique, I have nothing else like it! It is very flattering and looks even better with a summer tan :)
The fit is definitely big and loose. Just in case you're wondering what size you need, I would definitely either choose your usual size or a size smaller (if you don't want it to be quite so big). I have a small and it fits pretty big on me, but that is one thing I love about it! It makes it very airy and comfy :)
This tank top retails for $24.
One thing I had to point out about this company is their exceptional customer service and attention to detail. If I order something and the order goes through smoothly, I will definitely be happy with the company, but the attention to detail is what will really draw me to order from a company again. First of all, the order was shipped very smoothly and they kept me completely updated on the status of my order with emails. This made it easy for me to know how my order was going and shows the attentiveness that the company has for its customers.
But what really got me was when my package came! They sent me two ADORABLE stickers for free! And not only that, but two stickers the same color as the shirt I ordered, which I thought was a really cute touch.
And not only this, but I was also impressed by what they wrote on my order receipt (or whatever you call it):
Small details? Yes, but to me these are the little things that show that a company truly appreciates their customers.
I am completely impressed with The Southern Shirt Company and their products, and I will definitely be purchasing from them again! Who doesn't love great quality products with exceptional customer service?
I highly suggest you order from this company! Check them out at www.southernshirtcompany.com. I am absolutely DYING for one of their jersey pullovers!!
Anyways, I hope you enjoyed this post! Thanks so much for reading! :)
As I talked about in my last post, gel manicures are insanely popular right now! I got a gel manicure about a week ago and because of chipping, I took it off today (not going to talk about my feelings on gel polish too much in this post, if you want to read about my gel polish experience go here :)
Just so you know what I had to remove, this is what my gel manicure looked like after one week of wear:
Anyways, I don't know about the salons you go to, but at the salons in my town, they charge you when you get them to remove your gel polish, fake nails, etc. ($10!). After removing my own gel polish the first time I got a gel manicure and making some mistakes, and watching a nail tech remove someone else's gel manicure when I got my nails done this past time, I have figured out how to remove gel polish at home. It is easy, uses products you most likely already have (if not, they are easy to find), and removes the polish efficiently without killing your nails.
Here's what you'll need:
-Aluminum Foil
-Cotton Balls
-100% Pure Acetone
And yes I know that Acetone is not good for your nails, but it's the only way to get the stuff off and it's not like you will use it every day.
The first step is to cut your aluminum foil into five strips (I do one hand at a time). There is really no rhyme or reason to the shape of these strips as you will see in the picture, you basically just need them to be long and wide enough to cover your nails and wrap around your finger.
Next, soak your cotton ball in the acetone. It doesn't have to be dripping wet or anything, it just needs to have a little more than what you would normally use to remove polish. If you get too much its no big deal, getting too little on the cotton ball would be a problem.
After the cotton ball is properly soaked, place it on the nail. Grab one of your strips of aluminum foil and wrap it around the nail and then the excess around the finger. There really isn't a certain way to do this, you basically just want it to secure the cotton ball onto your nail and have the foil around your finger so that the cotton ball won't slip around.
This is helpful in two ways: for one, the foil creates heat around the nail which will help the polish come off easier. It also secures the cotton ball to the nail so that you can move around, walk around, mess with your computer, etc., and not have to worry about the cotton ball sliding off.
Do this to all five nails and you will end up looking like this:
Let this sit for about 15-20 minutes :) Some people claim that they don't need it to sit this long, but I have found that letting it sit this long makes it much easier to physically take off and prevents scraping that damages the nail (I learned that the first time I did this).
When taking off the foil, make sure you slowly drag the cotton ball across the nail while taking it off. When the cotton ball and foil are removed, your nail will either be completely free of polish or there will still be some left on the nail. If you have left the cotton on long enough and used pure acetone, you should be able to remove the leftover polish by either going over it with the cotton ball a time or two more (like how you usually remove nail polish) or by simply scraping at the leftover polish with your thumb nail. I hate to say "scrape" when talking about removing the excess polish because if this process is done right, the polish should come off by just lightly scraping at it with your thumb nail.
As weird of a picture as this is, this is what the cotton ball should look like after you remove your gel polish. You can see that the polish basically peeled away into the cotton ball.
This is what my nails looked like right after the polish was removed. They obviously need a little TLC, but they're not too bad!
After this there was some of what seems to be the base polish they used left on a couple of my nails that I couldn't seem to get off.
After this, I cut, filed, and buffed my nails and also nipped my cuticles (I hadn't buffed my nails or trimmed back my cuticles in a while so my nails needed it, but these steps aren't necessary. I would suggest at least lightly buffing your nails though). I also went ahead and did my usual at-home manicure routine, using my favorite strengthening base coat (NailTek 2 Intensive Therapy-- a review on this should be coming soon).
I hope this helps you out! I know that it may seem difficult after reading all this (I try to be very detailed) but it's really easy and fairly quick! If you have any questions feel free to ask.