Wednesday, May 29, 2013

Essie Hip-Anema Nailpolish

Being that it is almost summer, I have recently been looking for a bright, corally-orange nailpolish color! I have a few lighter colors like this, but I wanted a darker, more vibrant one, and I think I found it with Essie's Hip-Anema!
Hopefully you can read that.. I don't really get the name?
Anyway, this is a gorgeous vibrant coral-orange color! It has more orange tones than pink, which I really like.
 Also, it has an awesome formula! After one coat it was actually opaque enough that I could've left it, but I added another coat just to see how it would look. This formula is actually one of the best nail polish formulas I have used, just because it is so easy to work with. It applied so smoothly and I can't get over how great the color payoff is! It also has been wearing really nicely.
 
I highly suggest you try out this polish if you're looking for a nice bright color like this! I hadn't heard about this color before I bought it, but I'm definitely glad I did.
Anyways, thanks so much for reading! I hope this was helpful! :)


Tuesday, May 28, 2013

Revive Dried Out Mac Paint Pots--EASILY!

This weekend, I randomly remembered my old Mac Bare Study Paint Pot that I got 3 years ago (yes THREE!) and decided I wanted to see if I could find a way to revive it and make it useful again. I am usually skeptical of this sort of thing, but I actually found a super easy method that works, so I wanted to share it!
First of all, for those who don't know, a Mac Paint Pot is a cream eyeshadow that can be used as a regular eyeshadow, or as a base under other shadows. They retail for $18.50, so you can imagine why I wanted to try to save mine rather than buy a new one. Although I have only used this method with a paint pot, I heard that you can use it with gel liners and other brands of cream shadows and cream bases as well.
While looking up ways to salvage my paint pot, I came across many ideas. Some of these included microwaving the product and even mixing in strange concoctions, which I did not want to try. I saw some sources suggest the method I'm showing you, and I was impressed with it when I gave it a try. This idea is not my own, but I wanted to share with you my take on it and how it worked for me.
Before I share specifics, let me tell you the basic reasoning for this method. Whenever paint pots (and other cream products I imagine) dry out, they tend to pull away from the sides of their containers and gather towards the middle. Supposedly, the oils and moisture needed to keep the product creamy are still in the product--they are just concentrated in the middle.
In this picture you can see how the product is puling away from the sides of the pot. Mine is not too terribly dry, but I have seen this method work on EXTREMELY dry paint pots (so dry that they aren't touching the sides of the pot at all).
 
When the product is dry like this, although it may still be slightly usable, it is hard and you don't get the product's full pigmentation and potential. The picture below is this paint pot swatched when it is still in this dried out state.
 
Basically all you have to do is thoroughly mix the product together. I don't mean give it a little stir, I mean really mix it, like you are cooking or something! I mixed mine with the end of a little old spoon, but you can use a makeup spatula, a toothpick (although it may take longer), a butter knife, a manicure tool, or even the end of those little thin paint brushes you get when you're a kid. Just make sure you clean it before you use it!
 
 
Just keep mixing!
 
 
When completed, it won't be all smooth and pretty like it was when you bought it, but it will be super creamy and basically like new! I'd say the only downside is that it makes it a little messy looking. It took me about 5 minutes to do the whole process, and I probably only spent about a couple minutes mixing it (but keep in mind it will be different depending on the product, what you use to mix it, how dry it is, etc.).
 
 
And you're done! Although it looks much messier, the texture is so much better! I thought I'd conclude the post with a picture of it swatched after using this method. The product applies much smoother and easier and the color is more vibrant.
 
 
Hopefully this method helps you save your paint pot or any other cream product! If you use this method on anything other than a paint pot, comment and let me know how it works! Thank you all so much for reading!! If you have any questions or comments, comment them! I hope this was helpful :)


Sunday, May 26, 2013

Mac Blanc Type Eyeshadow

Highlighting is always the last step in my eyeshadow routine. I love to end my eyeshadow looks by going back and placing a light color under my brow and on the inner corner because this simple step seems to complete the look. It cleans, brightens the eyes, and pulls the entire look together. So let me introduce you to my all time favorite highlight shade: Mac Blanc Type.
 

I have had this exact eyeshadow for at least a year and a half, using it everytime I have worn eyeshadow (which is quite a lot). I was going to take a picture of the name on the back, but it was completely rubbed off. Needless to say, it has been well loved!
 
 
This shadow is a completely matte, creamy white color. It is not stark white, but not a beige, just slightly creamy off-white. It is perfect for highlighting under the brow or in the inner corner because it nicely highlights without the extremely shimmery look many highlighting shades have. Even when I use a little bit of a shimmery shade under my brows, I use this first to give a clean look to my shadow.
 

This eyeshadow has a great smooth texture that makes it easy to apply and blend. It is the perfect pigmentation, not sheer at all, but not so pigmented that it is going to overpower the rest of your look. This eyeshadow is a must-have in my makeup collection, being that I use basically it every single day.

I highly suggest this shadow! Currently, it retails for $15. If you're looking for a good highlight shade, this one is awesome! I definitely suggest trying it or at least swatching it at a Mac counter or store.
Thank you so much for reading! I hope that this was helpful and informative :) If you have any questions, comments, suggestions, or any products that I need to try/review, leave a comment and let me know!


Thursday, May 23, 2013

Review: Loreal Power Volume Collagen 24 Hour Mascara

Mascara reviews are very tricky because literally everyone has different taste in mascaras! Not only are everyone's lashes different (length, thickness) but nearly everyone likes their lashes to look different and prefers different formulas of mascara and different mascara wands! It's pretty complex, huh?
But although I think mascara reviews tend to be more based on personal preference, I always read reviews before I buy a mascara I've never tried.
That's why I decided to review my recent favorite mascara: Loreal Power Volume Collagen 24 Hour Mascara (longest mascara name ever).

I heard about this mascara in a makeupbytiffanyd video and I had never really heard about it before then. To start out, let me tell you what kind of mascara I prefer. I have about medium length lashes; they're not super long but not sparse, and they're not thin, but not insanely thick either. I tend to like thicker, wetter mascaras. I love to add volume, but length is always welcome, too :) I am not afraid of my lashes getting a little clumpy, especially because if it gets too clumpy, I just brush them out with an old mascara wand. Some of my past favorite mascaras are Loreal Voluminous Carbon Black and Lancôme Hypnose Drama.
 
This mascara provides huge volume and really good length too! It has a wet, thick formula, but isn't so wet that it's impossible to use. I apply two coats every day because I love huge lashes, but it probably wouldn't be necessary for everyone. I like that it doesn't make my lashes crunchy and keeps them soft. Also, it wears really well! I don't know about 24 hours (never had to keep it looking good for that long), but it definitely wears all day without flaking, smudging, or clumping and it keeps a curl fairly well (I do not have the waterproof version). And a great bonus is that although it wears well, it is easy to remove :)
 
I wanted to get some sort of picture up for you all of me wearing this mascara, although I really hate when reviews do include these pictures because they never accurately represent how the mascara looks in person. But for anyone who's curious, here is a picture of me wearing it (please excuse the messy makeup, I had just woke up from a nap haha).
 
 
The wand is a pretty big wand (probably the biggest I have ever used) and it is made of natural bristles? I'm not really sure what to call them. It's kind of like a supersized hybrid between the Lancôme Hypnose Drama wand and the Loreal Voluminous wand. The only real downside I can think of with this mascara is that it is very easy to get it all over the eyelid with the huge wand. Nearly every time I use it, I get little dots of mascara all over my eyeshadow. These do come off easily with a q-tip, but it is pretty annoying. Also, I have never tried to put it on my lower lashes, but I don't know how anyone could without making a huge mess with this mascara because the wand is so huge.
Overall, this is probably my favorite mascara that I have ever used. It provides me with huge lashes, and it is affordable, retailing for about $8 at drugstores. If you are someone who is terrified of clumps, this mascara is not for you. If you have really small eyes, this wand may overwhelm your eyes and just end in a mess. But if you go for big, dramatic lashes, this mascara is definitely a must-try! One of my friends actually asked me if I was wearing false lashes one day when I was wearing this, and I have received many compliments on my lashes while wearing this mascara :)
Thank you so much for reading! As always, if you have any questions, I would love to answer them, so just leave a comment! I hope that this was helpful! :)


Wednesday, May 22, 2013

Review: Nars Radiant Creamy Concealer

Concealer is an essential part of my makeup routine. I don't use foundation most days, just concealer on redness and dark circles and then a little powder over top to set it. Because I love concealer so much, I have tried a ton of different ones! I am always on the quest for the best concealer and I might have found it this time with the Nars Radiant Creamy Concealer!
 
I have this concealer in the color Medium 1 Custard and it works perfectly for me right now!
The concealer has a pretty good color selection and I easily matched myself to a color in Sephora.
I am not a huge Nars fan, so when I heard about this product I was pretty skeptical. Nars products are generally pretty expensive and any time I have tried them out, I haven't been too impressed with them. But after seeing Goss Makeup Artist (check out his YouTube channel) rave about it, I was more interested in giving it a try.
 
It is a classic liquid concealer, with the doe foot applicator and everything, which I really like.

I am going to try my hardest to write an informative review and not just rave about it the whole time.. But I LOVE this concealer! It has beautiful medium to full coverage. It is easy to apply and blend and looks natural on the skin. It wears very well and lasts throughout the day even on my bare skin in the hot southern weather.
I tend to go for more "liquid" type concealers rather than cream concealers because I usually find them easier to apply and find that they look more natural on the skin. This concealer is not truly liquid, but more of a hybrid between a liquid and a cream. The consistency is genius and provides good, buildable coverage. I apply this with the doe foot applicator by dotting it on the places I want to cover, and then blend it in with a crease brush from Sigma (the Tapered Blending E35 to be exact). I sometimes mix it with a lighter concealer when I went to highlight certain areas of my face more (under my eyes, bridge of my nose) and it works beautifully.
I honestly can't rave enough about this concealer. I highly suggest you at least try it out at your closest Sephora or anywhere else it is sold.
This concealer retails for $28 and has 10 shades. Thank you so much for reading! If you have any questions I would love to answer them, so don't be shy. I hope this was helpful :)


Monday, May 20, 2013

Review: Tarte EmphaEYES Waterproof Gel Liner

As most of you know, gel liner has become quite popular in the last few years. Most who are fans of gel liner claim that it is easier to use than liquid and more precise and longer lasting than pencil liner. The most talked about gel liners are usually from Mac and Bobbi Brown but I have a different favorite-- I have been using the Tarte Gel liner for about a year and a half and I adore it!


I have the color black, which is just a true black (shocking right?)


This eyeliner has a great, creamy consistency that doesn't dry out easily--which means you shouldn't have to repurchase often! A little bit goes a long way. And it truly is what it says it is: waterproof!! After swatching it, I rubbed on the swatch as hard as I could and all that happened was a little fading. It is extremely easy to use and is so versatile! My personal favorite use and how I use it nearly everyday is for my waterline. I use just a little bit on my waterline and it lasts virtually all day. I have never found a better product for the waterline, so if you're a liner lover like me, check this out!
 It also comes with a double ended brush that is really nice quality. I use the thin end everyday for waterline liner and I use the short shader end whenever I put shadow on my lower lashline, but these are just my most common uses for the brush. It is very versatile!


 This liner retails for $24 and is available wherever Tarte is sold, but I always purchase it at Sephora. I suggest to everyone, from those just beginning with eyeliner, to gel liner addicts, to those who love waterline liner like me. I really don't think you can go wrong with this product. It is a little pricey, but in my experience, I have only had to repurchase this once a year, so it lasts a pretty long time (as long as you make sure to always securely seal the lid).
Thank you so much for reading! If you have any more questions I would LOVE to answer them in the comments. I hope this helped! :)


Sunday, May 19, 2013

Review: Dior 5-Colour Eyeshadow Palette in Earth Reflection

I bought the Dior 5-Colour Eyeshadow Palette in Earth Reflection nearly a year ago in New York City, so I've had quite a bit of time to "get to know" the palette. Before I bought the palette, I found hardly any reviews on it, so I thought I would write one to help out anyone looking into purchasing it! Let's get started :)
*As a little disclaimer: my makeup is very well loved. If I use a product frequently, it is usually a little beat up after being tossed in my makeup bag, toted around everywhere, etc. :)
 
First of all, if you're looking for a luxurious product, this is it! Even the packaging screams luxury.
 
 
The product even comes in this velvety pouch to protect it--you may pay a lot for the palette but they definitely try to make you feel like you're getting what you pay for!

 
Sorry about the funny reflections, the packaging is almost mirror-like which makes it hard to photograph.
 
 
I took pictures in more bright lighting and then again without the brightness just so you could see the colors well. And yes.. there is a chunk missing from the middle shade. I accidentally scraped it with my nail one time :/


Now let's talk about the actual shadows themselves! These eyeshadows have a luxuriously smooth, buttery feel to them. They are extremely easy to work with and easy to blend. One of my favorite things about these shadows is that they have a true neutral undertone. Instead of having a pink or golden undertone to them, the undertone is truly neutral, making them easy to wear with any other colors. I love wearing this palette whenever I wear bright pink lipstick because the neutral undertones don't compete with the color of my lips and make my face look too pink. Every shade has a shimmer to it, but isn't glittery or overpowering at all. The shimmer is very subtle and wearable and I have found it to be flattering for all ages. It also photographs very well!
 
 
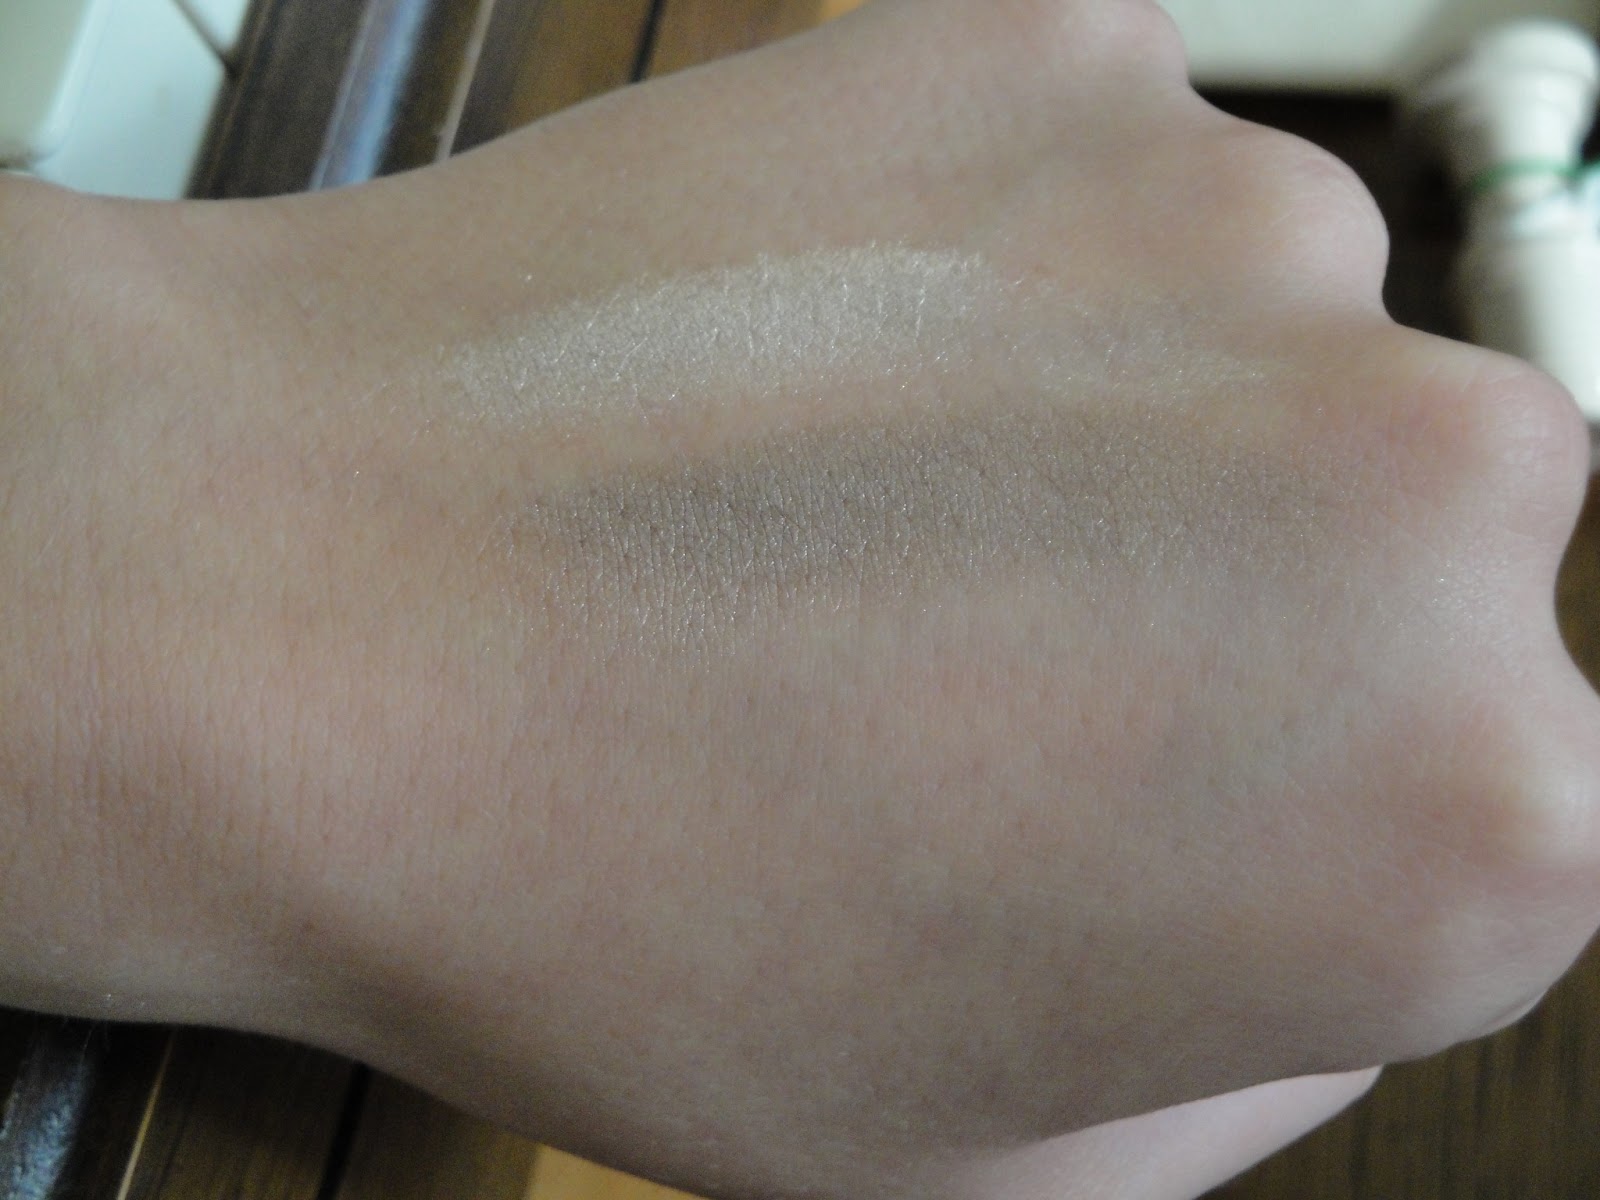
The color shown above is the color in the top left-hand corner of the palette. It's a beautiful light neutral shade with a slightly more noticeable sheen that is perfect for the lid.
 

The next color (which is in the top right-hand corner of the palette) is a beautiful light to medium taupe brown color.

The shade on third shade shown above is the one that is in the very center of the palette. In the pan this shade seems like it will have a very pinky undertone, but when swatched it actually just has a slightly pink undertone.


This shade is located in the bottom left-hand corner of the palette. It is a rich, deep brown that is perfect for the outer corner of the eyes (or anything else you want to use it for!).
 

This last shade is the shade located on the bottom right-hand corner of the palette. It is a light shade perfect for highlighting under the brows or in the inner corner of the eyes.
 
Overall, I love this palette! It is very high quality and luxurious to use. Although it only has 5 shadows, there are numerous looks that can be created with this palette, from simple everyday looks, to smoky eyes. This palette could work for nearly anyone, from those looking for a good neutral palette to use every day, to beauty junkies like me :)
 
This Dior 5-Colour Palette comes in other colors as well and retails for $60. In my opinion, the price is the only downside to this palette. For someone who is planning on using this palette as their only eyeshadow, I think it is definitely worth the price. For others, hopefully this review has helped you decide if it is right for you!
Thank you so much for reading! If you have any questions, feel free to comment them and I will be happy to answer them! :)