Thursday, September 26, 2013

Rimmel Show Off Lip Lacquers Review +Swatch of Comet

When it comes to lip products, I tend to be pretty picky. I hate the feeling of a heavy lipstick on my lips. I also hate having to fuss with the lip color smearing and having to reapply constantly. With that being said, I usually don't buy expensive lip products (or any at all) because I hardly wear anything on my lips.
Lucky for me (and all of you, too!) I found a GREAT drugstore lip product that is affordable! And even I approve of it! 
This is the Rimmel Show Off Lip Lacquer in Comet! Rimmel markets these lacquers as not a lipstick and not a lip gloss-- something bigger and better than both of those. I would describe these as a liquid lipstick.


These lacquers have a doe foot applicator that is different from anything I've ever seen! The applicator has a groove in it that holds more product so that you can cover your lips completely without reapplying. Although it holds enough product for your lips, it doesn't apply too much, so you don't end up with a mess! This doe foot applicator also makes it easy to be very precise.


These lacquers have a great formula! The formula is like that of a liquid lipstick, except it doesn't "harden" and dry. The formula does set, but does not make your lips feel tight and dry. The finish has a slight gloss to it when first applied, but eventually wears to a semi matte finish.
These lacquers wear for a very long time! Mine lasted at least 3-4 hours with me drinking, eating, etc. One of my favorite things about these lacquers is that it doesn't "chip off" or collect on your lips as it wears. It wears off very evenly without looking gross and feeling uncomfortable. Also, it leaves a slight stain on the lips without looking messy.
 The only issue I have with the formula is that it can make your lips feel kind of dry after a few hours of wear. Nothing obnoxious and flakey, but your lips definitely lose the moisturized feel with time. This can be fixed with a sweep of gloss or chapstick though.
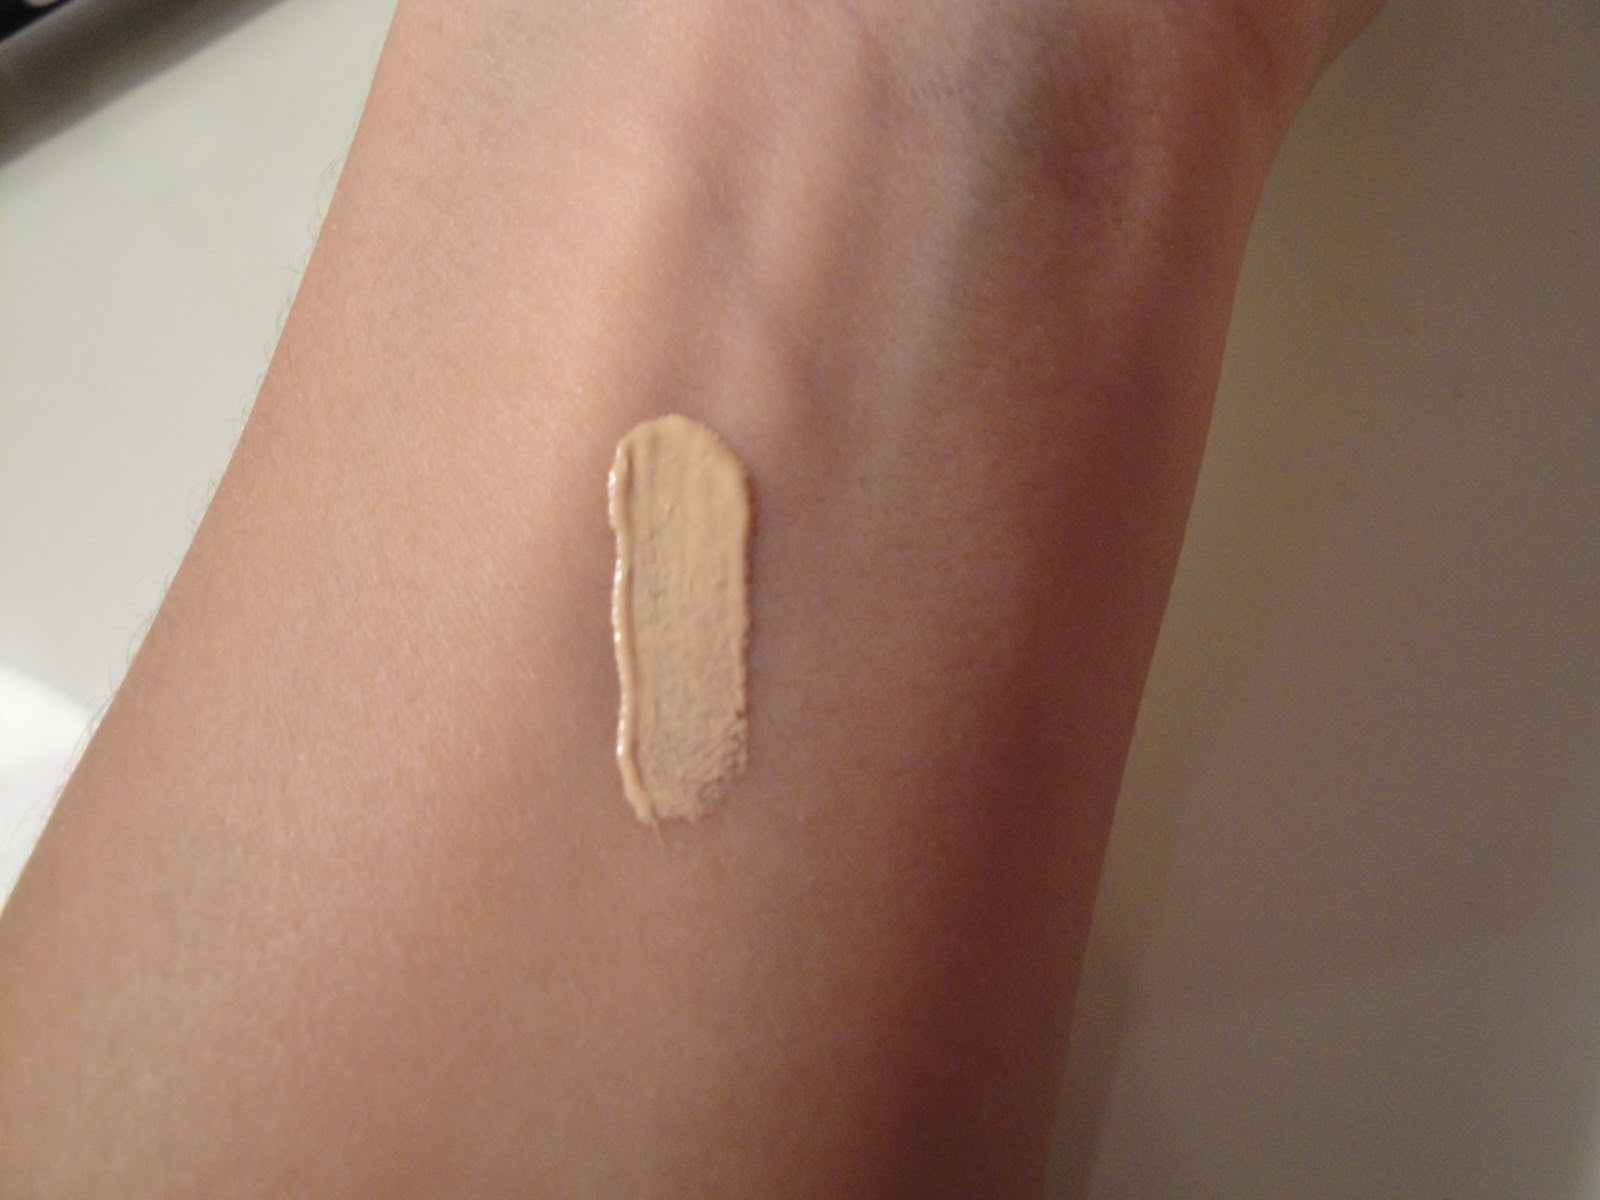
These lacquers are also INSANELY pigmented. The picture below is one swipe. Although they're very pigmented, they don't feel heavy or cakey. They are also buildable, so if you want more color, it can be achieved easily!


I chose the color "Comet" because I repeatedly saw it described as a "my lips but better" shade. This is the issue I have with this color. Although this color is definitely a neutral shade, it isn't just slightly darker than my natural lips like most "MLBB" shades. This color is more like "my lips but 15 times darker"!


This color is a neutral pinky-brown. It is a great neutral shade for every day for those who are comfortable wearing darker color on their lips. It is darker but not so dark that it's "shocking" or "distracting". Because I'm not as used to it, I tend to only wear it on occasions when I want to look nicer, but it never disappoints.
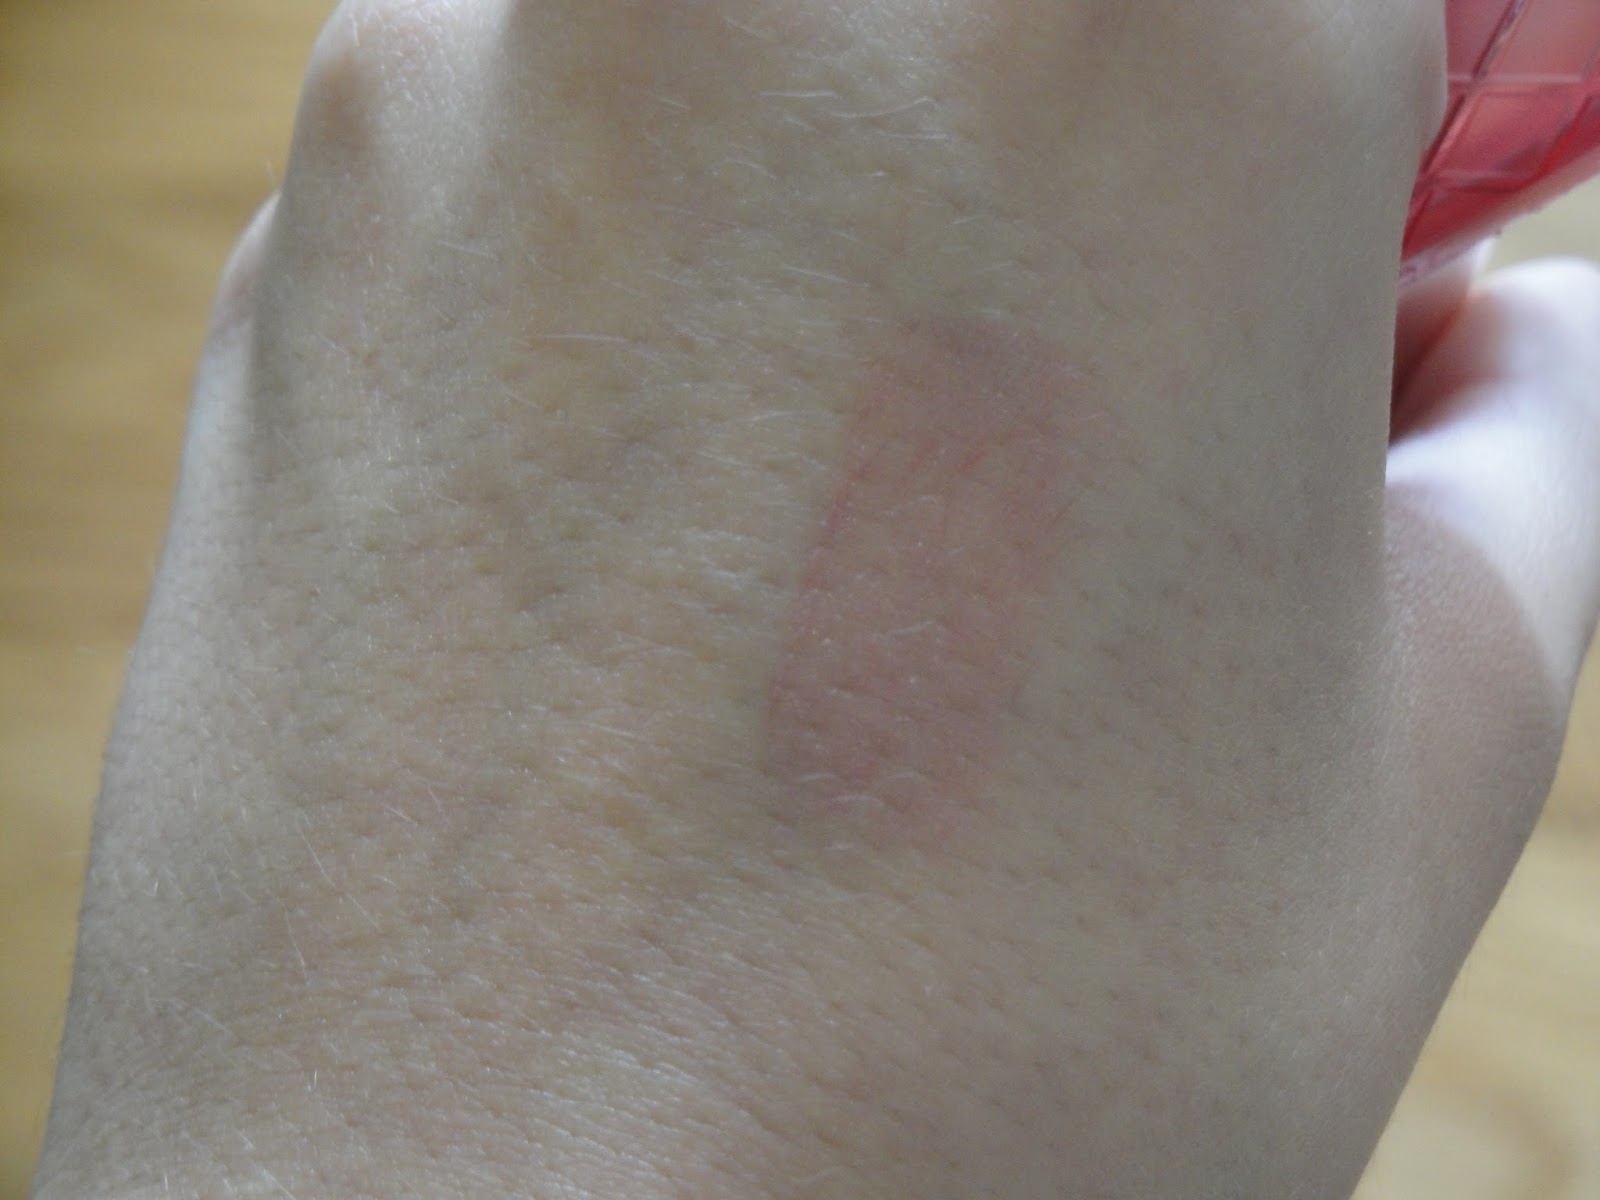
When I want to tone the color down a bit, I can easily do that by blotting my lips. I do this by putting a tissue in between my lips and simply pressing my lips together. This gives a more wearable color:


These lacquers have a rosy scent to them, but it's not too noticeable and
I can't smell it at all once it is applied. 
The best part? These retail for around $6-8! 
I definitely suggest these Rimmel Show Off Lip Lacquers and I love the color Comet! I think Comet will transition even better into fall and winter. 
Thanks for reading :)

Saturday, September 21, 2013

OPI Tomorrow Never Dies Nail Polish Swatch and Review--The Perfect Purple for Fall!

Purple is my favorite color and I especially love it on my nails for Fall! I bought Tomorrow Never Dies by OPI last year as an impulse buy and never expected that it would become one of my favorite nail polishes!


This color is a gorgeous royal purple color with a slight royal blue duo-chrome to it. The picture picks up more of a blue-toned purple because of the duo-chrome but the color looks like more of a true, almost grape popsicle color purple in person. It is also slightly deeper than it looks in the picture.
This color has an amazing formula that applies extremely easily and is opaque with two coats! I love that the color is no-nonsense and applies without a fuss.
This color has become one of my go-to fall colors and I can't wait to wear it throughout the season!
This color is from the James Bond Skyfall collection that released last Winter, but you can usually find colors from collections fairly easily. 
 OPI Polishes retail for about $9.
Thanks for reading!

Thursday, September 5, 2013

Mac Love Joy Mineralize Blush Review and Swatch

So we have finally reached September, and I don't know about you, but when it gets to around this time of the year I am pretty much done with summer. Although the afternoons here are still hot, the mornings are starting to dip into the 60s and it's slowly but surely (very very slowly) making a transition into fall. I am completely ready for boots, sweaters, and leaves falling off of the trees!
 In honor of my favorite time of the year, I got a new blush that I thought would be gorgeous for fall and also something different to add to my collection: Mac Mineralize Blush in Love Joy!


This is my first Mineralize blush from Mac! Just a sidenote--there is another Mineralize blush from Mac called Love Thing, so be sure to not get them mixed up!


Love Joy is a very unique color that is nearly impossible to describe! It is a slightly rosey, midtone brown color with gold shimmer. Although you wouldn't expect it to, it has a slightly apricot looking undertone on the cheeks (possibly from the gold shimmer?). When first swatched you may think it is too glittery, but once applied, all that is left is a subtle, glowy shimmer.


Love Joy is a great color for fall because it is a bit deeper, but I think it would transition well into summer as well because of its bronzey look. 
I am completely impressed with the formula of these mineralize blushes!! They not only have a great color payoff, but are easy to apply, blend well, and have a great staying power! I highly suggest checking out Mac Mineralize blushes even if this one isn't for you because in my opinion, they are better than the regular formula of blushes. If you do decide to try a mineralize blush, I highly suggest swatching them in store before buying one because they tend to be a little deceiving in the pan! 
*Quick tip: when swatching products, especially blushes, make sure you blend them onto your hand, wrist, etc. not just on your finger because some products look different when they are actually on your skin.
Just a disclaimer-- this blush is EXTREMELY pigmented. I am someone who loves blush and tends to wear a lot of it so I am usually not intimidated by people saying that a blush is pigmented. Especially because I never swirl my brush into blushes and most blushes don't show up well on my skin tone, but this blush shocked me! 
The first time I used it, I barely tapped my brush in twice and I ended up with a huge stripe across my face! My suggestion is to lightly tap your brush in once, tap off any extra, and then lightly blend onto the cheeks. If you want more color, simply repeat the process. It is better to layer the color than to begin with too much on! 
Overall, I am completely in love with this blush and have been wearing it daily. I highly suggest you check it out next time you're near a Mac counter because the pictures don't do it justice.  
These blushes retail for $25 wherever Mac products are sold. 
I hope this was helpful! Thank you for reading :)

Sunday, August 25, 2013

Revlon Lip Butter in Berry Smoothie Review and Swatches!

The craze of the Revlon Lip Butters has proven to not just be a trend-- its popularity has lasted quite a while now!

And I can definitely see why! These lip butters are moisturizing, easy to apply, and wear beautifully on the lips! When on the lips, they have a beautiful light sheen that makes your lips look nice and moisturized. They can be applied lightly for a slight tint or built up for a more noticeable color. They also feel very light on the lips, you can't really even feel that you have them on. AND there is a HUGE color selection! I can almost guarantee that there is a color for everyone and every occasion! 
This color is one that I haven't heard talked about quite as much as the others: Berry Smoothie!


This is a gorgeous light berry shade that easily adds color to the lips. The color is very versatile and could go with many different looks. One thing I love about this shade is that it can be a light tint or a full on nearly opaque color. 
The first picture is Berry Smoothie applied lightly:

The next picture is Berry Smoothie applied more heavily with more coats:

As you can see, you can get a light tint or a darker, brighter color (and everything in between) all from one product! It's almost like having two or three different lip colors in one!
This would be great for a day to night look-- you could apply lightly for daytime and then build it up for a darker look for night.
I would say the color wears for a few hours depending on how much you eat, drink, apply chapstick, talk, etc. But although it's not long lasting, it's not a big deal because it is so easy to apply. This color also leaves a slight berry tint to your lips once it is worn off which is very flattering!
Quick tip: If you want the color to wear longer or be more opaque, apply a lip liner under it!
Anyways, this is a great color and I highly suggest it (and any of the lip butters really)! I got mine at Walgreens in a buy one get one half off sale, so look out for those! These generally retail for $6-7.
I definitely suggest this color, check it out! Thanks for reading!
By the way-- the color on my nails in the pictures is this :)

Wednesday, August 21, 2013

Sally Hansen Pacific Blue Nail Polish Review+Swatch

When it comes to the in-between seasons part of the year, it can be kind of awkward to figure out which colors to wear. As of now, the weather is slowly transitioning from summer to fall and although it's still warm, it's cooling off and looking and feeling a little bit more like fall. My solution to this awkward half-summer half-fall time is to cut out the super light pastels and wear darker colors that are still bright! A perfect one is actually from the drugstore!

You may have heard of Sally Hansen Pacific Blue before because it has been raved about for a while! This polish is a GORGEOUS and unique medium blue shade. What makes it different is it's bright almost neon quality. This polish is nearly guaranteed to be noticed and complimented by those who see it!
This polish has an awesome formula and a wide brush that makes application faster and easier. It applies completely opaque with two coats.
One more awesome thing about this polish? I picked it up at my local Walgreens for only $2.97! I was a little nervous that the quality wouldn't be there but I am completely impressed and am hoping to try more of these soon!
One more side note, if you were looking for a unique, bright, medium blue color, definitely try this one rather than Essie Butler Please. That one is terrible quality AND more expensive. Just a side note!
Anyways, I hope this post was helpful! Definitely check this color out. 
Thanks for reading:)

Monday, August 12, 2013

Revlon ColorStay Concealer Review

So this weekend I ran out of my beloved Nars Radiant Creamy Concealer.. And because I don't live anywhere near a place that I can purchase Nars, I knew I had to pick up a concealer to get me by until I could get a new one. I couldn't use any of the concealers I already had because NONE of them were in my shade. So what does any makeup junkie do when they are in need of a quick fix? I started researching drugstore concealers!
I read quite a few reviews on the Revlon ColorStay concealer, good and bad. I wasn't too surprised about the mixed feelings on it because nearly every concealer I looked up had the same variety of reviews. I was choosing between this one and the Revlon PhotoReady concealer, and this one won because I was more comfortable with the liquid consistency rather than the stick formula of the PhotoReady. 
 I picked up this concealer in the shade light, which was too light for me
 
I expected to like this concealer because it had a lot of things that I liked in it. First off, it was in the ColorStay line, and Revlon ColorStay is my favorite foundation. Also, it was a liquid concealer that came in a tube with a doe foot applicator, which is my favorite kind of concealer. So I thought, 'how bad can it be, right?'
 WRONG! This concealer is TERRIBLE. At first, it seems like it is going to be awesome. When you start dotting it on, the concealer looks nice and opaque with a little bit of a thicker consistency. But once you start blending is when the real magic happens. As you blend, the concealer literally covers nothing. All it does is leave an odd layer over the skin that barely conceals anything. But while it has hardly any coverage, it still manages to look cakey and heavy. How that's possible? I HAVE NO IDEA!
I really tried to give this mascara a chance. I tried blending it in with my fingers and a brush and both gave the same effect (blending with my fingers actually made it look worse).
This product ended up being nearly $10 when I purchased it at WalMart. So it's fairly pricey for a drugstore product and it's terrible quality. I will definitely be trying to return this one tomorrow.
As you can see, I do not suggest this product. I honestly can't imagine it working for anyone. Unfortunately, this one is a miss :( 
Thanks for reading! I hope this was helpful!

Wednesday, August 7, 2013

Maybeline The Rocket Volum' Express Mascara Review

So after using the same mascara for months and months (Loreal 24 H Power Volume Collagen Mascara.. See a review here), I started itching to try a new one. Does anyone else get that way?
Anyway, my friend told me about Maybelline the Rocket and I had heard a lot about it, so I started looking at reviews to see what I could find. After finding reviews, and then finding it for only $5.94 at WalMart (YES, A MASCARA FOR $6!!!!) I had to try it!


I included two pictures of the wand without any mascara on it just so you could really see it. First things first, this wand is amazing! I have to be honest, I didn't think I would like it.. at all. I am usually not a fan of rubber wands, especially because the ever-so-famous Covergirl Lashblast Volume has a rubber wand and literally does NOTHING to my lashes. So from the beginning, I wasn't really expecting much.
But I was most definitely wrong! This wand is filled with fairly long rubber bristles. Because there are so many bristles, the wand catches each and every lash. The long bristles help to not only apply the product but to evenly sweep and comb it through the lashes. This wand is the best I have ever used, by far!
 In this picture with the wand with mascara on it, you can see that there are no clumped spots on the wand. 
The formula of this mascara is more on the wet side, but don't let that scare you away! It is not thick and messy, but more of a thin wet consistency. It is very easy to work with.
This mascara gives excellent volume from the first coat! It volumizes, separates, and adds a little length. It is very buildable, so with each new coat you get added volume and more drama! This mascara builds better than any I have ever tried. 
And one of the best features? NO CLUMPS. EVER! I am not someone who is repulsed by a little bit of a clumpy look, but this one has blown my mind. The wand truly separates and makes clumping nearly impossible. Even with three coats, my lashes still looked defined. I always thought volumizing mascara with separation and definition was just impossible, but here it is!
Also, I have had no problem with this mascara smudging or flaking on me. For me, it wears all day just fine. The only complaint I have is that whenever I accidentally get it on my eyelid while applying it, it is very hard to get off. Most of the time, I can use the q-tip trick, but this one does not come off. So you may need to be a little careful.. but to me it is still worth it!
Lately, to get more length, I have been applying my mascara in a different technique. Before combing through my lashes with the wand, I apply the mascara first to the tips of my lashes. After I have applied some to the tips, I go ahead and comb through all of my lashes. I do this with the second and third coat as well (if I do a third coat). It still volumizes my lashes just as well, but with some added length. I got this idea from this video:
 

So that's it! I am so surprised that I fell in love with this mascara but it is definitely my new favorite. Give it a shot!
Thank you all so much for reading! I hope this was helpful!